 Here is a sneak peak of what we are going to be doing for our club this month. Aren't these just the cutes or halloween treat bags! The technique is very easy!
 Here is a sneak peak of what we are going to be doing for our club this month. Aren't these just the cutes or halloween treat bags! The technique is very easy!


 Here is my card for Beates challenge. I used her color inspiration challange BIC24 and her weekend sketch WSC59 in one card, though I did change the sketch a little bit, but I think it still fits. I used only Stampin Up supplies, which were Fresh Cuts and Riot of petals set, Kiwi Kiss, Chocolate Chip and Very Vanilla card stock, and then Tangerine Tango, Kiwi Kiss and Chocolate Chip Ink. I also used the small tag punch and then hand cut the kiwi peice under it. I think it turned out nice. Very simple and fast! Though, It took me a while to actually put it together, but it didn't have to :) I was just being picky about the layout! I couldn't decide if I wanted to use this strip of chocolate chip paper with the vine style stamp on it, or if I should use the beautiful double stitched 1" chocolate chip ribbon. I opted to stick with the card stock because I had already gone to all the bother of stamping it. I do like the look though. Anyway, there's my card :)


 These two cards are made with the set "Dreams Du Jour". I love to color, so I used Stampin Up's watercolor crayons. The red one I used Ruby Red, Bashful Blue, and Old Olive Cardstock with the same colors of crayons. The blue one I used Not Quite Navy, Bashful Blue, Mellow Moss Cardstock. The Crayons are great because I can just outline an image, or in this case I just colored the lines of the flowers, and then used a watercolor brush and that activates the crayon and smoothes out the color. It's amazing. You can count on that being one of the techniques for our club coming up!
 This is also "Dreams Du Jour". I used 4 of the 6 in colors-Pacific Point, Kiwi Kiss, Riding hood Red, Tangerine Tango- with natural Ivory and Black Cardstock. This was a very simple card, but it turned out nice :)
 Yes I think this Eastern Blooms set will be one of my fav's! I love it. I used Tangerine Tango again (yes I love orange) with a chocolate chip stampin up marker. I just got my first set of the markers and they are great! I love being able to ink my stamps more than one color before it even hits the paper. Anyway, I used Close to Cocoa and Tangerine Tango Cardstock with some Linen thread tied around. Also I used the "Sanded" background stamp. I got the basic idea for the card on the web, so I can't take full credit for it. Oh yea and you'll notice that the white piece on the card has a sort of textured look to it. That's a fun technique that will be in one of our upcoming classes as well.
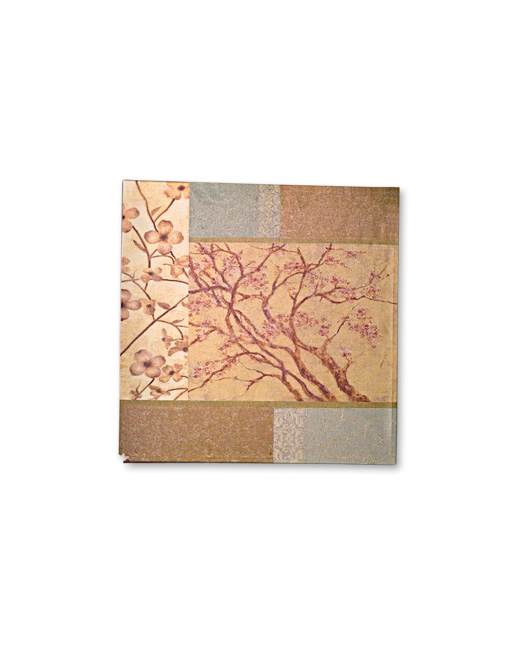
 This is a cute little booklet made from the 3x3 love notes and envelopes set. It has two envelopes and two 3x3 (actually 3x6" piece of card stock). The set on the front is a new one called "Eastern Blooms" The orange is one of the new in colors called Tangerine Tango. You will see this color a lot from me since I LOVE orange! It's a beautiful orange. You'll have to see it in person to appreciate it.
  This card is made form the new set called "flight of the butterfly". Though, we didn't actually use any of the butterflies. If you click on the picture hopefully it will get bigger and you can read the cute sentiment. The flowers on the green half circle are actually what I could put in the butterfly wings (take a look at the scrapbook page below) This card also used some of the chipboard letters. Oh yea and check out the new 1" chocolate chip double stitched ribbon! The new catalog is AMAZING! I can't wait to share it.
 This 8x8 scrapbook page also used the "Flight of Butterfly" stamp set. The butterflies in red at the top are actually a two step process. First I stamped the solid image in Versamark, and then the dots in Rose Red ink (which is the same color as the paper). The dots could be the flowers from the card above and one more pattern, which I believe is an outline. I can't remember right off hand. With little boys I don't get excited about butterflies as a mother with little girls ;). Oh speaking of little girls. I guess I should have gotten permission from my Sis to post a picture of her daughter on here. But isn't she cute! I tried to remember what age she would be and honestly I have no clue. Maybe around 6 months?? Now she has gorgeous blonde curly locks! Anyway...back to the subject :)
 Above is the cutest bag! I used the Stampin up "life's a breeze" stamp set. It was very simple...just a rectangular piece of cardstock scored and folded up. Held together with eyelets and linen thread. You can't tell very well in the picture, but the brown strip is actually sandpaper! This picture does not do the bag justice! I used the in colors-soft sky, wild wasabi and blue bayou. Sadly these are retiring on the 10th of this month. (but there are 6 more new and exciting colors being released in the next catalog-which is amazing!!!)
 This is just a card I made to show versatility in the stamp set.


